Thursday, September 25, 2008

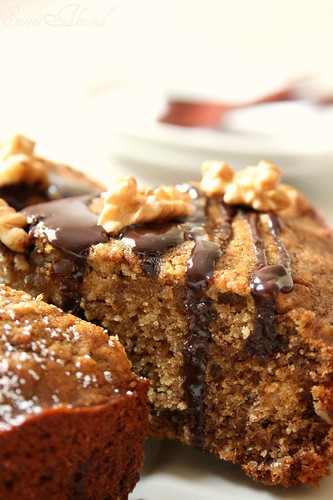
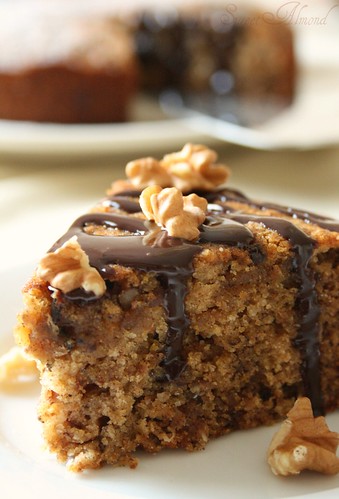
Date & Walnut Cake

I have always been skeptical about a cake made with dates. Although I love to eat dates, I just couldn't imagine this fruit being one of the main ingredients in a cake. However, we do have many traditional cookies made with dates. I come from a country where dates are a very popular fruit. In fact, Algeria is known for a variety of dates that is so unique and delicious. It is called "Deglet Nour" or "Nour's dates" also known as "The queen of dates". It is very sweet and tender, but what makes it unique is the fact that it is so transparent that you can see the pit from outside. I, so far, didn't see any other type of dates that has this criteria. I've seen some "supposedly" deglet Nour sold in the US, but I am always disappointed. It doesn't taste like the real thing at all!


Date & Walnut Cake

After this short lesson about Algerian dates history, let's talk about this cake, shall we? Since I never made a date cake, I had to look for a recipe. At my surprise, there were tons of them. Sure, they had all some points in common, but as always, just by reading a recipe, I could figure out that something might be wrong: too much sugar, too little butter...etc so I ended up creating my own recipe! and It came out perfect just the way I expected: perfect sweetness, very moist and full of flavor. It's been a while I didn't make a cake and ate more than half of it! yes, it is that good!

Date & Walnut Cake

Date and Walnut Cake

1 cup chopped dates
1 cup boiling water
1 cup all purpose flour
1/3 cup whole wheat flour
1 egg
5 Tablespoons granulated sugar
1 stick unsalted butter, melted and cooled
1 tsp baking powder
1 tsp baking soda
1/8 tsp salt
1/2 tsp vanilla extract
1 tsp orange zest
1/3 to 1/2 cup chopped walnuts

1- Preheat the oven to 350 f. butter an 8 in cake pan and cover the bottom with parchment paper. Butter the parchment paper too. Set aside.


2- Sift together the flours, salt and baking powder. Remove 1/3 cup of this mixture and mix it with the walnuts. Set aside.


3- Put the chopped dates in the boiling water. Simmer for about 5 minutes over medium low heat. Turn off the heat and add the baking soda. Set aside to cool.


4- Beat the egg with sugar, vanilla and orange zest until light and fluffy. Add the date mixture and mix until well combined.


5- Add the flour, butter and walnuts to the egg mixture and fold gently until evenly combined. Bake until a tooth pick inserted in the middle of the cake comes out clean, about 30 to 35 minutes. Set aside to cool before enjoying!

Friday, September 5, 2008

Baking Dilemma

I think I must seek help because I can't resist this recuring temptation of throwing my head into one baking experience after another!!!! I am afraid I would wake up one morning and find my hands turned into whisks! or my hair into strings of vanilla beans!! actually that one would save me a lot of money! Hmmm, since the "vanilla bean" subject surfaced and since I have some that's been in my pantry for a while, I wonder what is the best way to enjoy and get the most flavor out of a vanilla bean? I am thinking may be a custard, or....oh one of my favorite indulgences : Crème Brûlée! don't be intimidated by the fancy name, it is one of the easiest yet chic desserts. It is basically a rich custard topped with a crunchy layer of caramelized sugar. An intoxicatingly delicious combination of smooth silky custard and a crunchy sweet topping. Well, I guess I just found another excuse to grab my whisk.

Vanilla Bean Crème brûlée (serves 6)

2 cups heavy cream
50 g granulated sugar
4 egg yolks
1/2 vanilla bean split and scraped
6 tablespoons granulated sugar

Preparation

1- Preheat your oven to 325 f.

2-Heat the cream and the vanilla over medium heat .

3- Beat the yolks and the sugar until pale in color. whisk in about 1/2 cup of the cream . Gradually add the remaining cream whisking vigorously. Strain the brûlée base through a fine mesh sieve. Pour the custard in the ramekins.

4- Cook the custard in a water bath: pour some boiling water into the pan and place your ramekins inside (pour enough water to come up half way on the sides of the ramekins). Place the pan in the oven on the middle rack and bake for 30 minutes. To test for doneness, jiggle the pan slightly to see if the custard is set. Remove and let cool at room temperature then place in the fridge for at least 2 hours.

5- Once the Crème brûlée has cooled, evenly spread 1 tablespoon of sugar over each ramekin and using a blowtorch, caramelize the sugar to form a candy coating.

Enjoy! with moderation it's pretty rich

Thursday, September 4, 2008

Tartes Aux Fruits - Fruit Tarts

I've been baking for as long as I can remember. This passion started since I was a child. I remember my first experience in the kitchen, I made an apple sauce and was so excited! and my first cake experience was a DISASTER. I was 8 or 9 years old, made the cake batter who was a "normal, liquidish type of cake batter" (I bet the cake could have been a successful one !!!) but I thought to myself "how can a mess like this turn into a cake" So guess what I did?? I threw the batter in the bathroom and warned my younger brother who was watching my adventurous catastrophe "If you tell mom, your sister will turn into the evil sister"......euh that's a tactic I used to trick him with, poor kid!
So, you can imagine how passionate I've always been (and always will) about baking. What you cannot imagine is that I don't eat a lot of sweets, unbelievable but true! I love to create, decorate, temper, assemble, beat, fold, any term you can imagine in the pastry world, but when it comes to consuming, I am very picky and have limited and specific preferences and the first thing that comes on top of my list is fruit tarts. My list may include also: tiramisu, fraisier, clafoutis....well I should write down a list but let's just keep this for another post :)
Fruit Tarts

I make my fruit tarts with either a Pâte Brisée or a Pâte Sucrée (sweet dough) , it really depends on the filling and the type of fruit used. A fruit tart should have a balance in sweetness between its three major components : the crust, the cream and the kind of fruits used. I also lighten my pastry cream by adding some whipped cream which, not only gives it a more airy texture, but also enriches its flavor. Yes, everything is better with cream.................and butter!

Recipe for one 9-in tart or four individual 4-in tarts

Pâte Brisée (crust)

250 g all purpose flour
125 g cold unsalted butter
1 tablespoon granulated sugar
1/8 teaspoon salt
1/8 teaspoon vanilla extract
2 to 3 tablespoons cold water


To make the dough, use either a food processor, a mixer or a bowl and the best tools : your hands! Combine all the ingredients except the water. Work the mixture until crumbly. Add the water one tablespoon at a time until you form a dough. It is very important not to over work the dough otherwise your crust will shrink in the oven and you will not have that light, flaky kind of crust. wrap the dough and chill for at least 30 mn. This step can be prepared up to 2 days in advance. Just wrap the dough well and keep it in the fridge.

Pastry Cream

1 cup whole milk (don't use low fat versions please)
2 egg yolks
40 g granulated sugar
30 g corn starch
1 teaspoon vanilla extract
1/4 cup heavy whipping cream

Heat the milk in a pan over medium heat. Meanwhile, combine the egg yolks, sugar and corn starch and mix until well combined. Gradually, add the hot milk. Put the mixture back in the pan and cook, stirring continuously (not the time to answer the phone, yeah yeah I know baking requires a lot of sacrifice) until it thickens. Off heat, stir in the vanilla. Transfer to a bowl and cover with plastic wrap and let cool at room temperature then into the fridge for up to 2 days.
When ready to use, whip the cream and fold it into the COLD pastry cream.


Preparing the tart shells

Preheat the oven to 375. Remove the dough from the fridge and if it got too hard, let it sit for about 15 minutes. Flour your work surface and roll out the dough to about 1/4 in thickness. I like my crust pretty thin.
Arrange the dough on the mold (s) of your choice. Pick the entire surface of the dough with a fork and layer a piece of foil on top of it. Fill the foiled pan with beans. This will help the crust keep its nice shape.
Cook the crust for 10 minutes then remove the foil (and the beans!) and continue baking until lightly brown. Cool completely before filling.

Tart Assembly

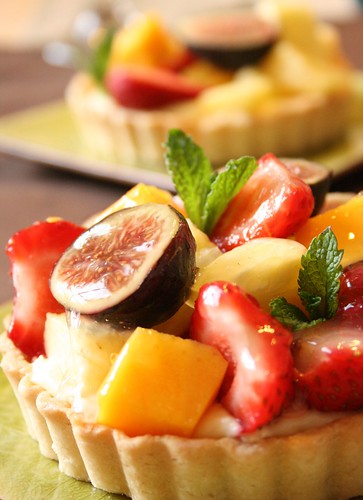
Fill each tart with the cream and your choice of fruits. In this particular one, I used : strawberries, figs, pineapple and mango. Use any type of glaze to make the tarts look shiny: fruit glaze, apricot jam...etc. This is optional though.

Enjoy!